Task
Tasks are one of the features in Nobox.Ai used for managing team or individual tasks. You can manage all activities, user tasks, or tasks assigned to others.
.png)
On the display, there are several sections, each with its own function. The explanations of these functions are as follows:
| Features/Buttons | Function |
|---|---|
 | Used for adding boards. |
 | Used for adding tasks. |
 | Used for displaying pop-up to edit or delete board data. |
 | Used for display in kanban form. |
 | Used for displaying in calendar form. |
 | Used to display in list form. |
Add Board
To add board data, please click the [ ], button to display the [Add Board] dialog.
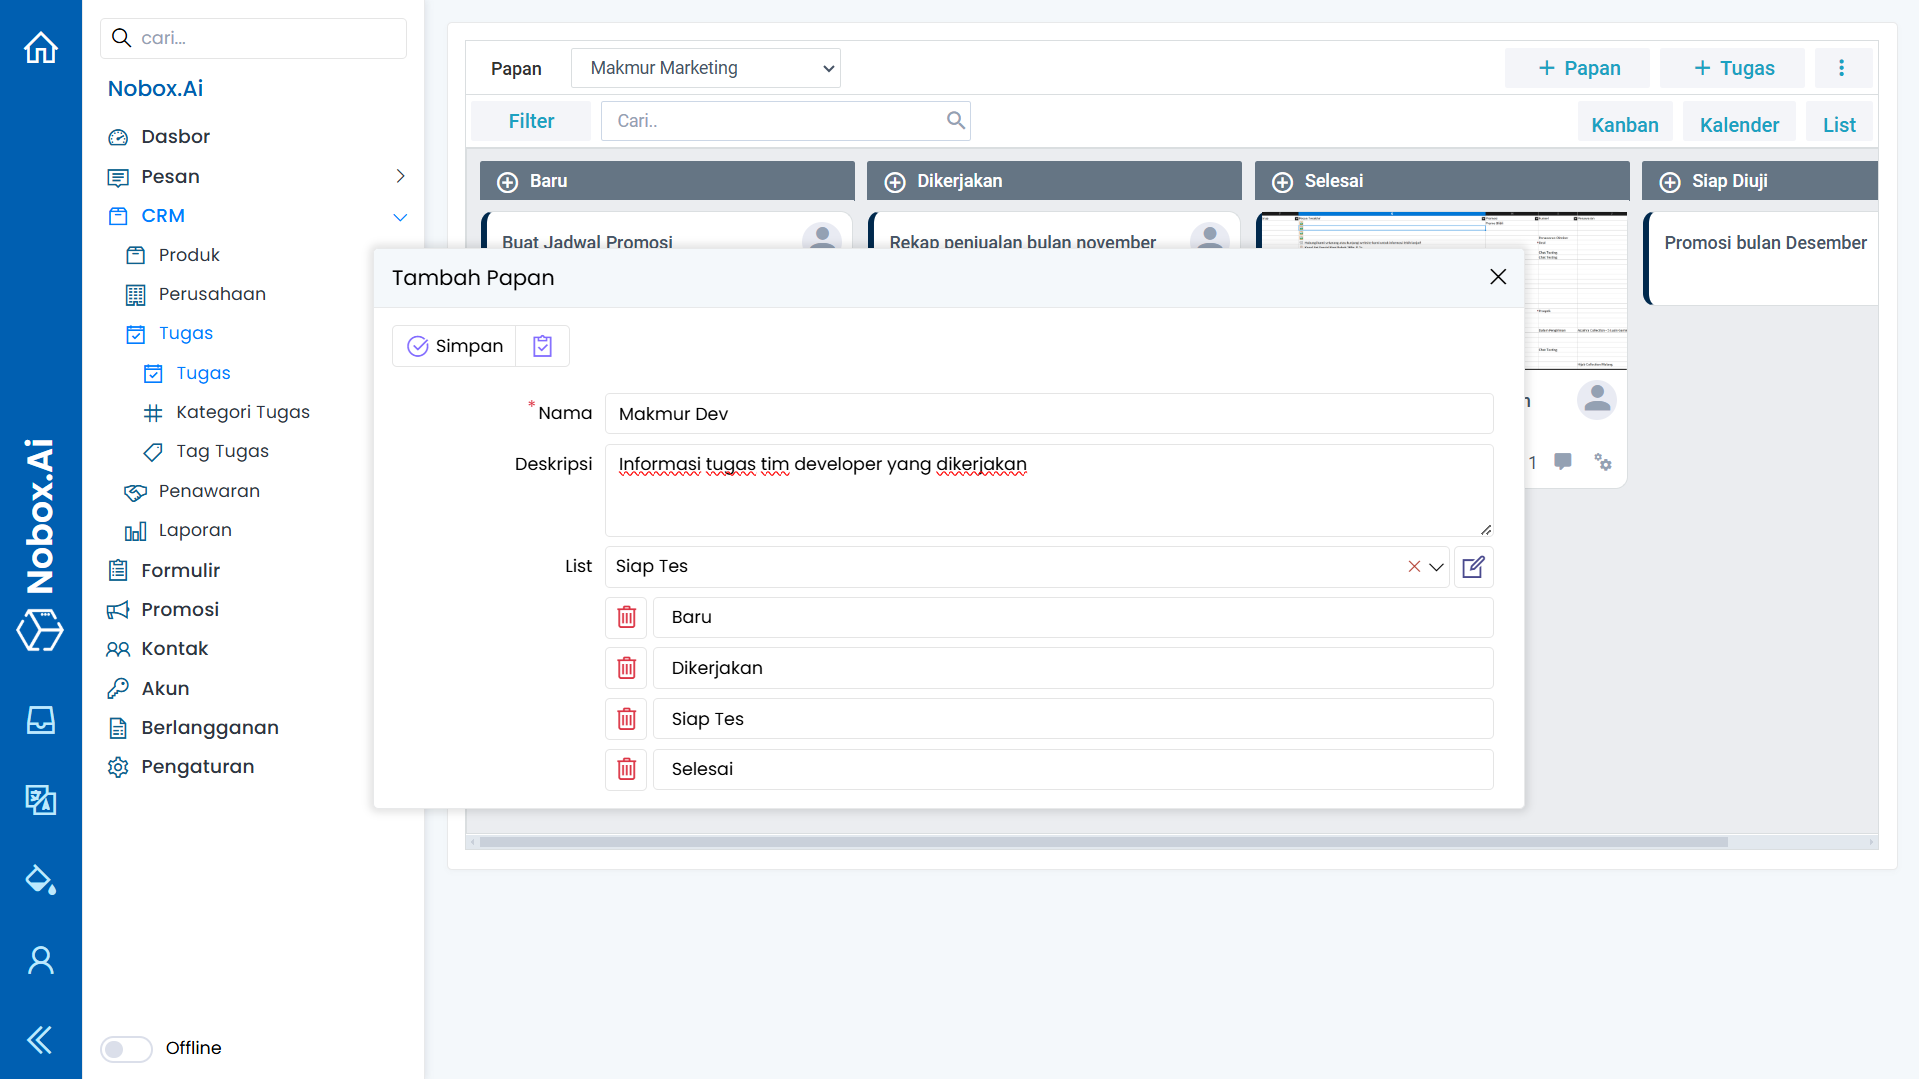
Fill in the required fields, for example, as follows:
| Entry | Description | Example |
|---|---|---|
| Name | Board Name | Makmur Dev |
| Description | Board Description | Information on the tasks the developer team is working on |
| List | Task stages | New, Working, Ready to Test, Done |
If you have completed the form, click [Save] to save the newly created board data.
Edit and Delete Board Data
To edit a board data, first select the data you wish to edit. Click the [] icon, a pop-up will appear; choose the [Edit] button, edit your data, and then click [Save] to apply the changes.
To delete a board data, select the data you want to delete, then click the icon [] to display a pop-up. Choose the [Delete] button, and a confirmation dialog will appear asking if you want to delete the data. Click [Yes] to confirm or [No] to cancel.
Add Task
To add a task, please click and the [Add Task] dialog will appear.

Complete the required fields, for example as follows:
| Entry | Description | Example |
|---|---|---|
| Name | Task Name | Project Simulation |
| Detail/Plan | Task details/plans | Simulation from the beginning when a customer registers to use the system until the report is issued and until the customer stops subscribing. |
| Next Steps/Results | Next steps or task results | Create a google sheet of checked feature data |
| Attachment | Task Attachment | - |
| Owner | Task Owner | Jasmine |
| List | Task List | New |
| Category | Task Category | Development |
| Priority | Priority Level | High |
| Tag | Task Tag | Simulation, Project |
| Start Date | Deadline | 09-11-2024 |
| End Date | End of time limit | 12-11-2024 |
| Contact | Contact who is working on the task | Wara |
| Company | The company that carried out the task | PT. Indodrink |
| Transaction | Transactions related to the task | Wara Indodrink Deals |
If you have completed the fields, click [Save] to save the task data you just created.
Edit Dan Delete Task Data
To edit a task data, please first select the data you wish to edit. Edit your data and click [Save] to save the changes.
To delete a task data, first select the data you want to delete, then click [Delete]. A confirmation dialog will appear asking if you want to delete the selected data. If yes, click [Yes]; if not, click [No].
Comment
Comments are one of the features of Nobox.Ai used to provide opinions, responses, or feedback on the task.
Add Comment
To add a comment, click the [ ] icon to open the comment dialog. Enter your comment and click the [Send] button to submit it.

Edit and Delete Comment
To edit a comment, first select the data you wish to edit. Then click the icon [], which will display a pop-up with Edit and Remove options. Choose the [Edit] button, make your changes, and click [Send] to save them.
To delete a comment, select the data you want to remove. Then click the [] icon, click [Remove], and a confirmation dialog will appear asking if you want to delete the data. If yes, click [OK]; if not, click [Cancel].
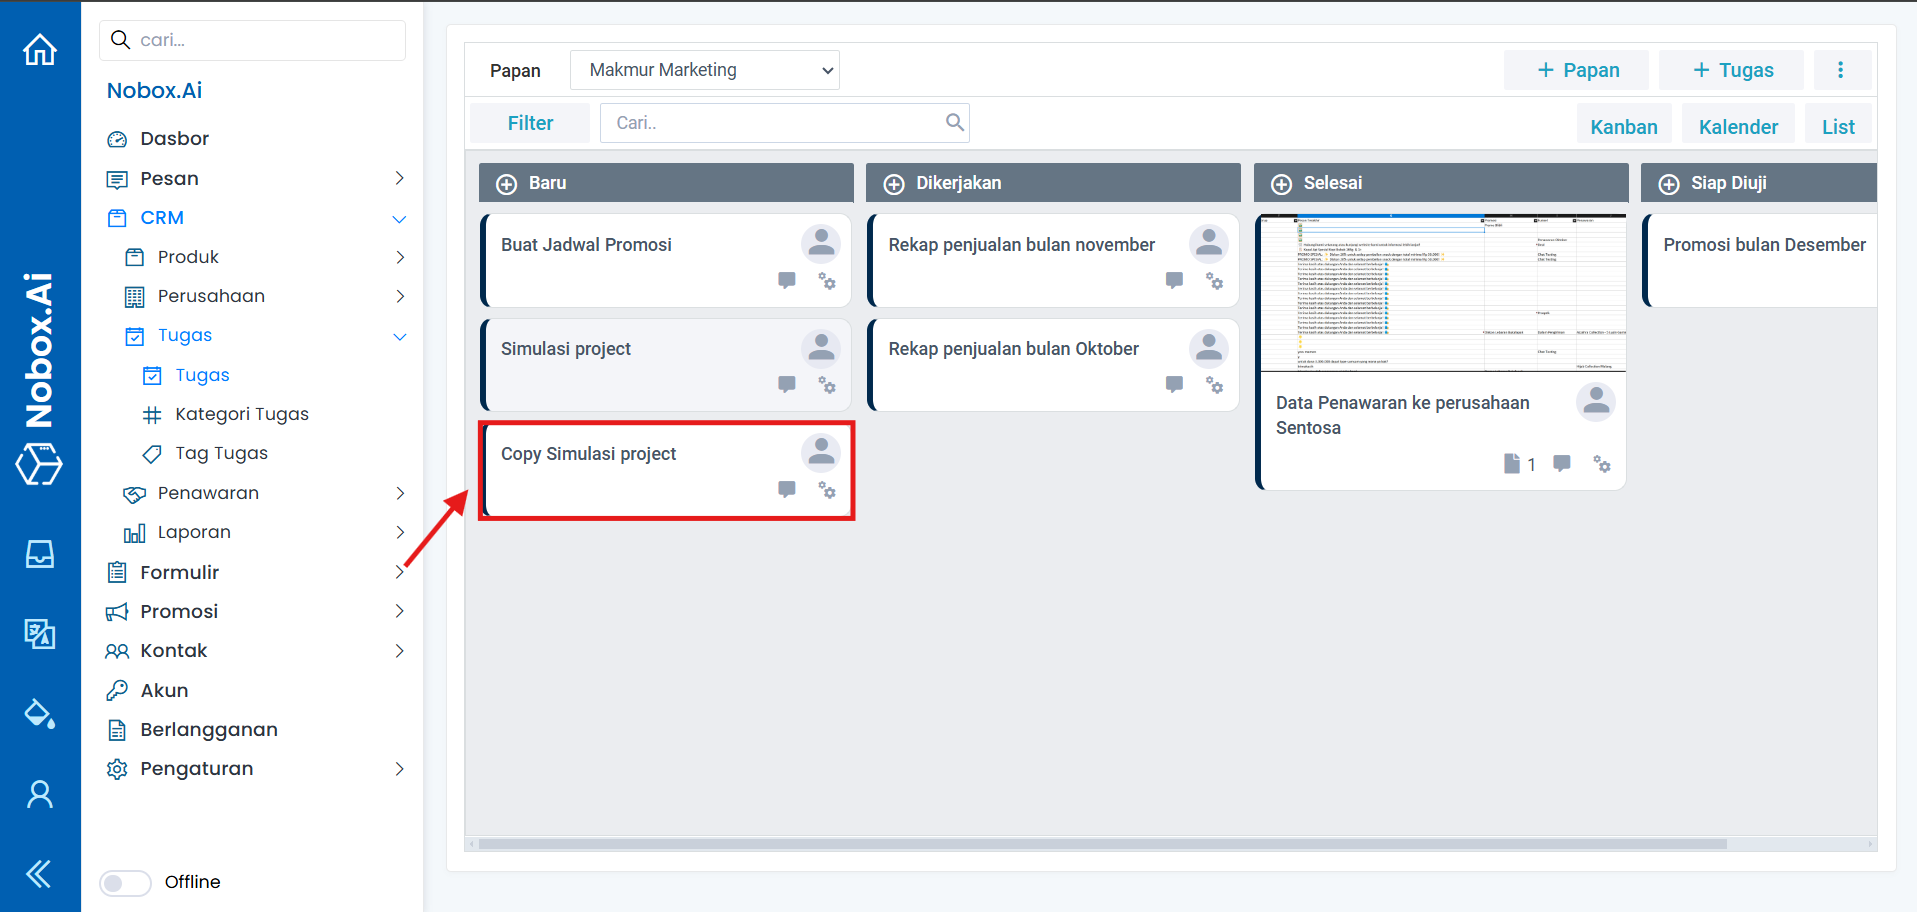
Copy Task
The assignment copy feature allows you to easily duplicate your task data. To copy task data, click the icon [ ] and select [Copy]. The task data will then be duplicated.
If you encounter any issues or difficulties with Nobox.Ai, please contact us via Support Ticket