Campaigns
Promotion is one of the features in Nobox.Ai that allows for easy and efficient promotion to target audiences. It is integrated with various channels such as WhatsApp, Telegram, etc.
.png)
On the display, there are several promotion statuses. The explanations for these statuses are as follows:
| Feature | Function |
|---|---|
 | The draft status of the promotion data has not been processed yet. |
 | Promotion data processing status is still in transit. |
 | The status for the promotion data has been marked as complete. |
 | The promotional data cancellation status has been revoked. |
To add promotion data, please click the [Campaign]➔[New Campaigns] menu, and a [New Campaigns] dialog will appear.

Please complete the required fields, as per the example provided:
| Fill-In | Description | Example |
|---|---|---|
| Name | Promotion Name | 2024 Year-End Promotion |
| Channel | Choose the channel to be used | |
| Account | Choose an account | s_whatsapp tester |
| List | Choose list | End of Year |
| Group | Choose group | - |
| Tag | Choose tag | December Promotion |
| Tim | Choose tim | - |
| Format Message | Choose format message | Text |
| Short link | Information on shortening a link tracker | Inactive |
| Message | Message promotion | Enjoy affordable pre-dawn meal promotions while stocks last! |
| Attachment | Attachment file | - |
| Send attachments based on data sources. | Enable or disable sending attachments based on the source to send attachments from the data source. | Inactive |
| Start, End | Start and end date of the promotion delivery | 28-11-2024, 29-11-2024 |
| Schedule an Appointment | Schedule Promotion Information | Inactive |
| Schedule | Set the date and time for the promotion schedule | - |
| Notes | Promotion notes | Promotion for Customers |
If you have completed the fields provided, click [Save] to store the new promotion data you just created. The status of the promotion will be [Draft], and you can proceed with the promotion process.
Template
Nobox provides a data template to simplify data formatting. The explanation for this template is as follows:

- Template is used to select the template message that will be used.
- User is used to display the username.
- Company helps you effortlessly display your company's data, such as name, email, address, etc.
- Contact is used to easily display contact data such as name, phone, email, etc.
- Data to fetch data linked from the data source file.
- Random is used to display characters in a random or uncertain order.
- Spinner is used to send pre-determined text randomly.
- Synonym is used to help you create text variations that have the same meaning.
- Tracking is used to send a link to track whether the link has been read.
- Split is used to separate the message balloons that will be sent.
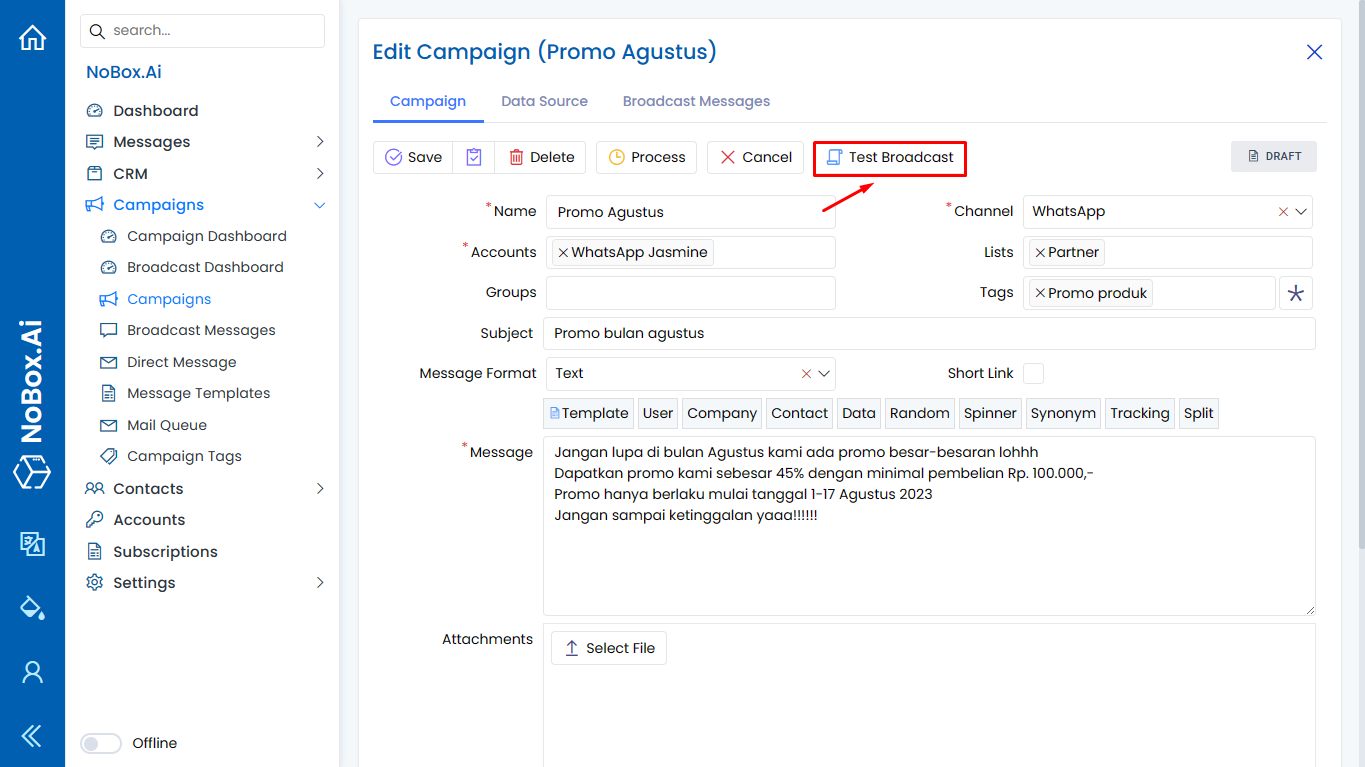
Message Sending Test
After creating the promotional data, you can test the promotion to check if it meets the requirements. Please click the [Test Message Send] button to have the data sent to your number or email.
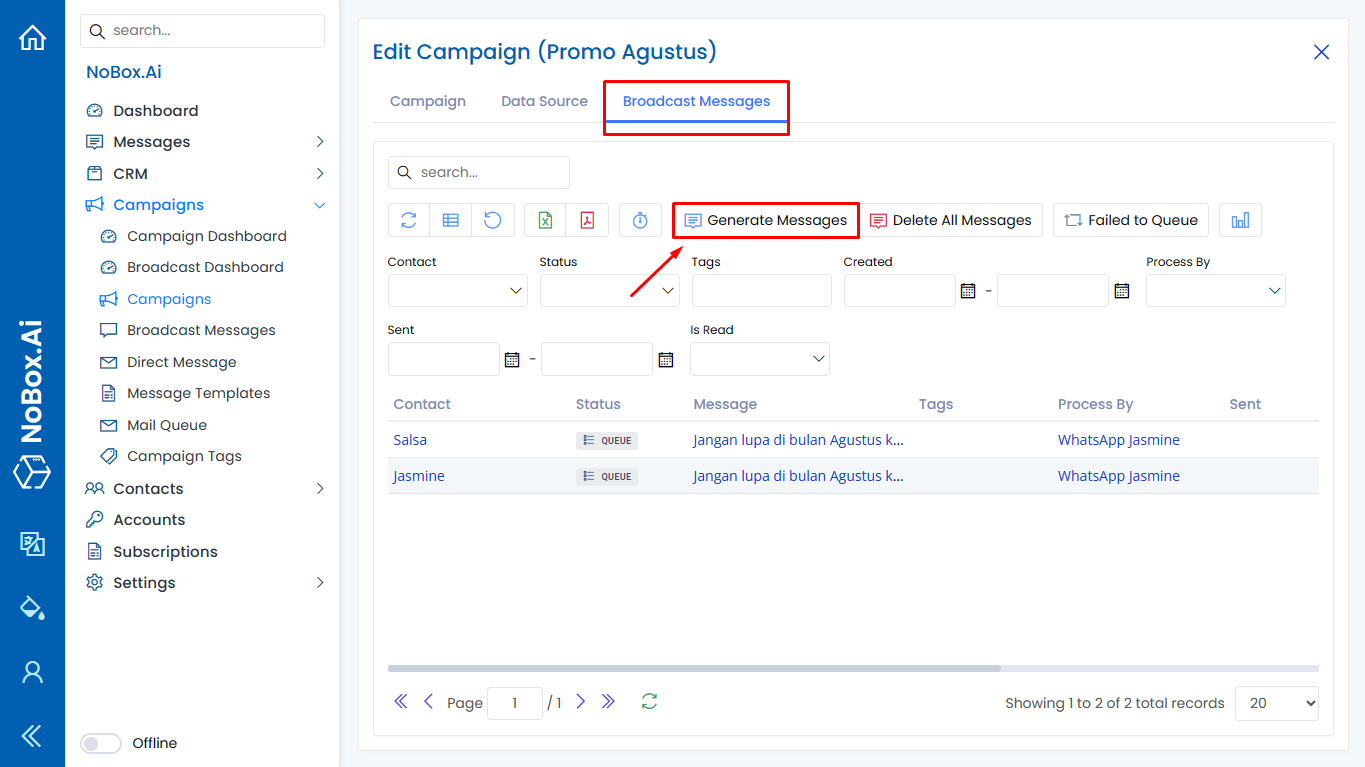
Create Message
After the Send Message Test is successful, you can proceed to Create Message to see if the broadcast message results match the number of contacts. To Create Message, please click on the [Send Message]➔[Create Message] tab, then the broadcast message data will be displayed according to the selected contact list.
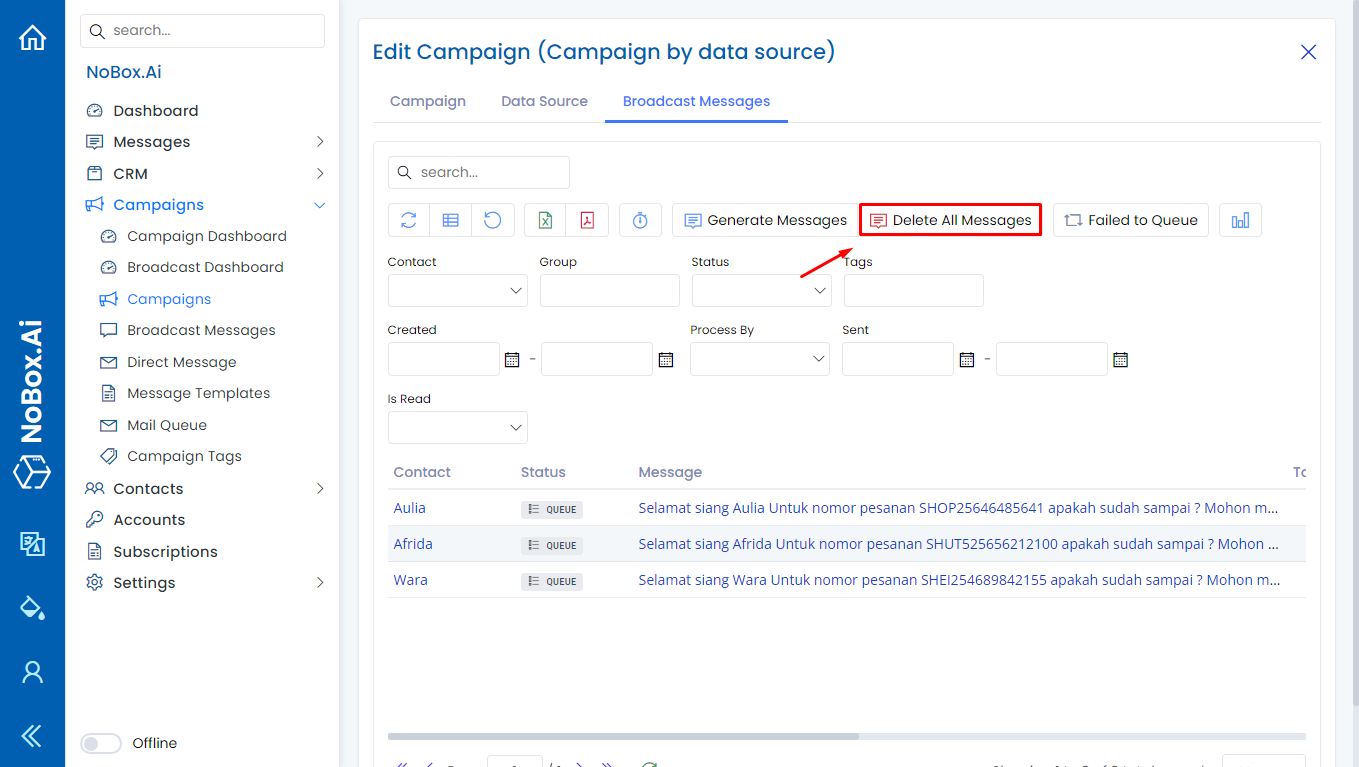
Delete All Messages
Use "Delete all messages" to remove all the messages that have been created.
Promotion Process
When processing promotion data, you can [Create Message] first and then click [Process], or directly click [Process] to automatically create and send the promotional message. The promotion status will change to [Process].

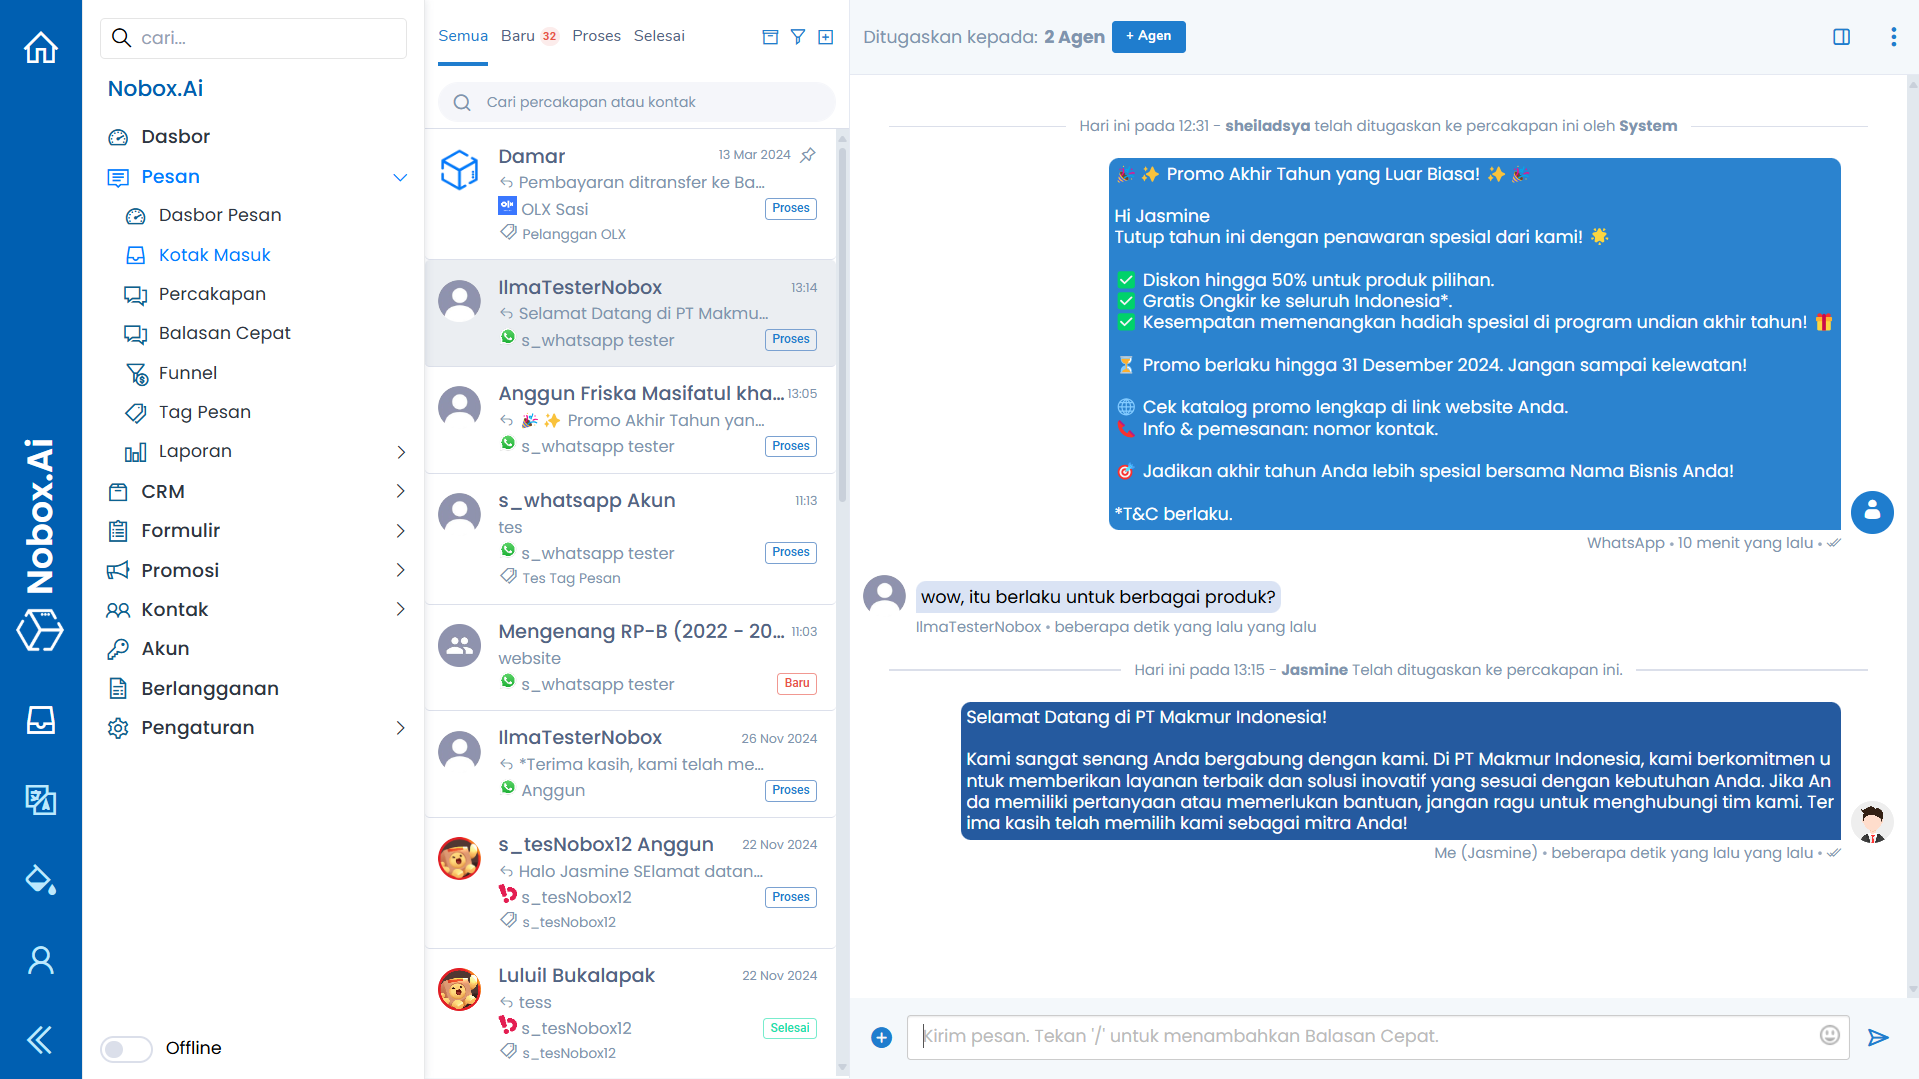
To monitor your promotional delivery, navigate to the [Send Message] tab.
You can also view the results of the promotion in the [Inbox] menu, allowing you to monitor the promotion results and respond to chat directly with your promotion targets.
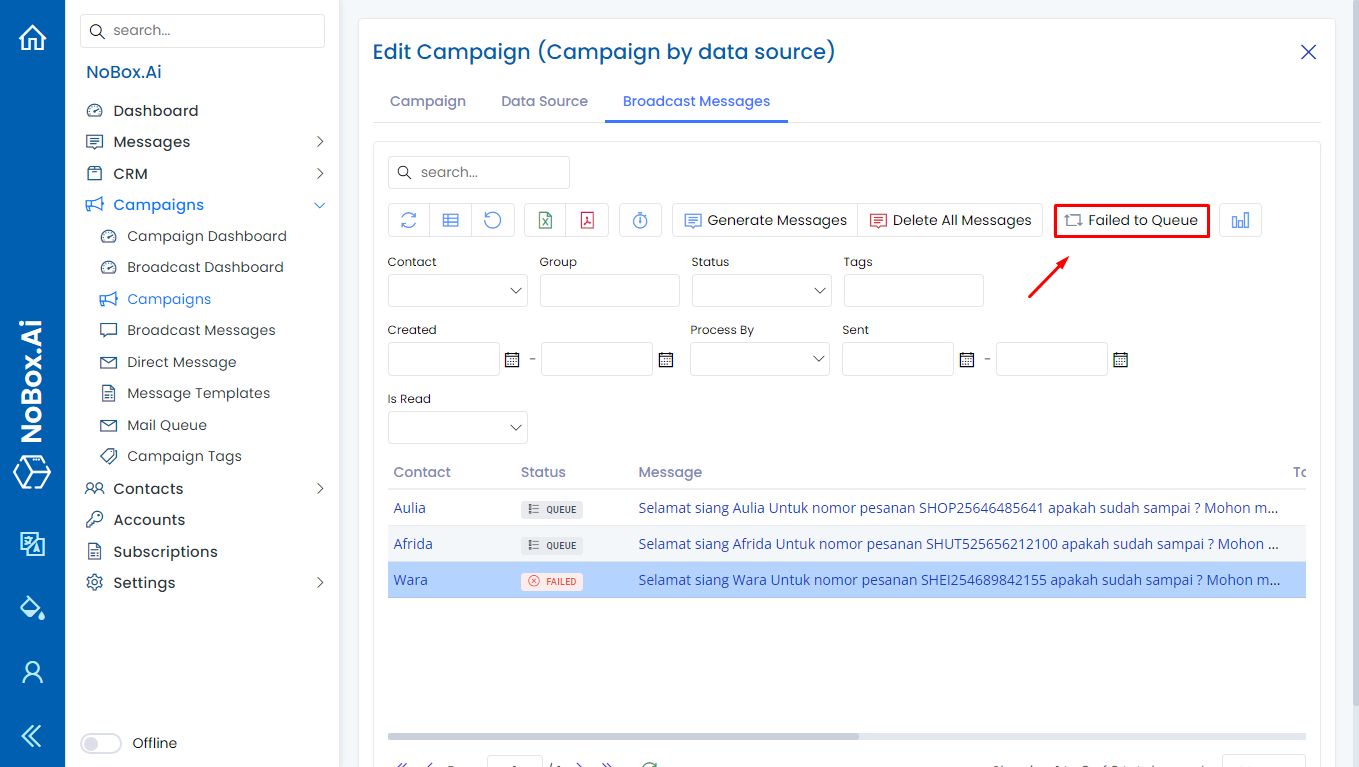
Fail to Queue
To-queue failure is used to re-send messages with a failed status back into the queue.
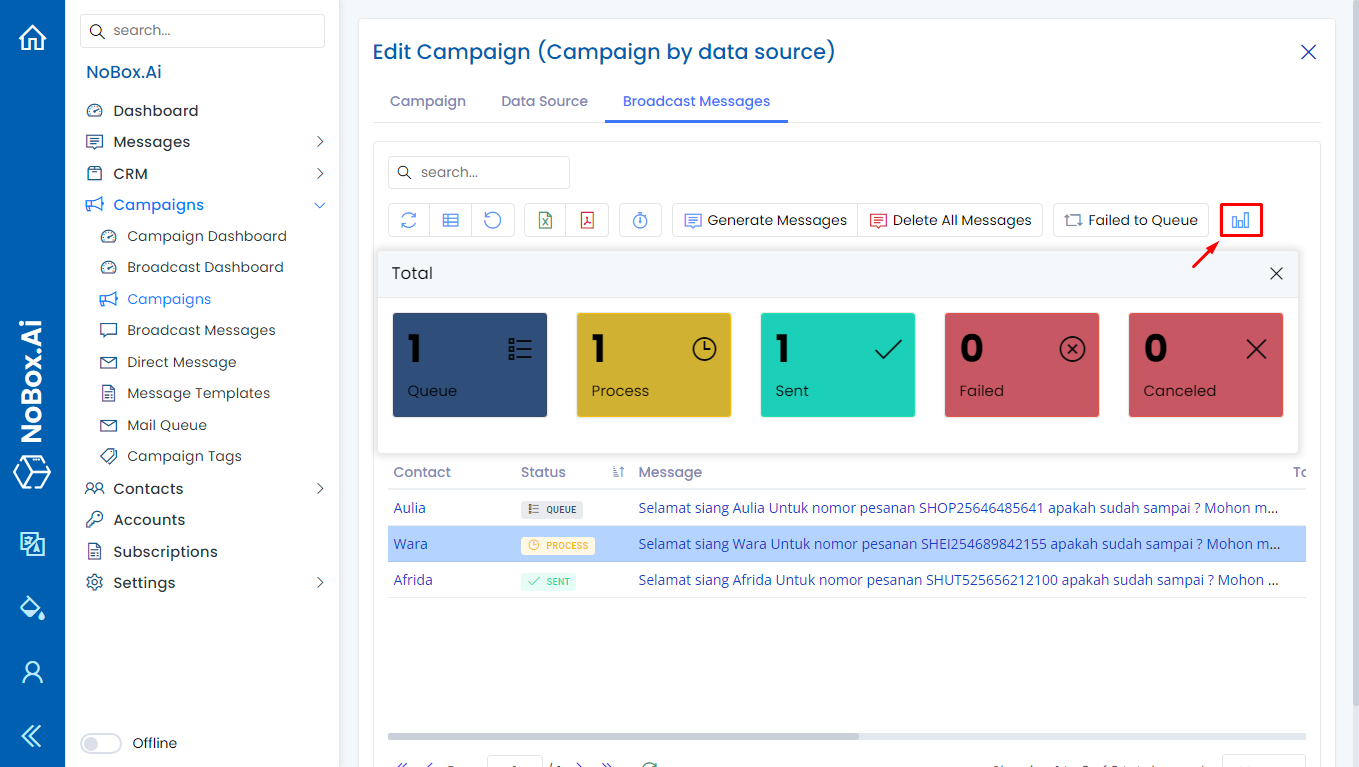
Total Messages Sent
The total message sending feature is used to display the total promotions according to the status.
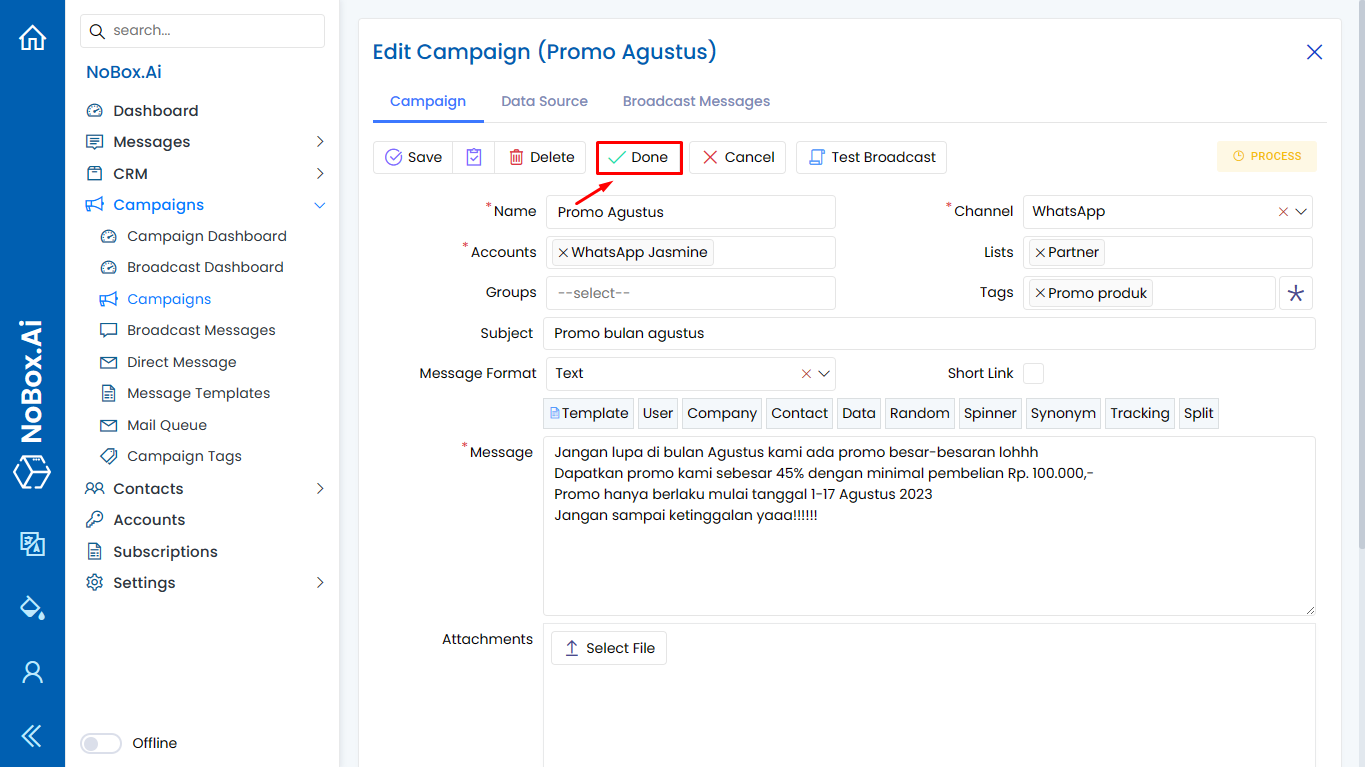
Mark Promotion as Complete
Once the promotion has been successfully processed to mark it as completed, you can click the [Complete] button, and the promotion status will change to [Complete].
Cancel Promotion
To indicate that the promotion has been canceled, you can click the [Cancel] button, and the status of the promotion will change to [Canceled].
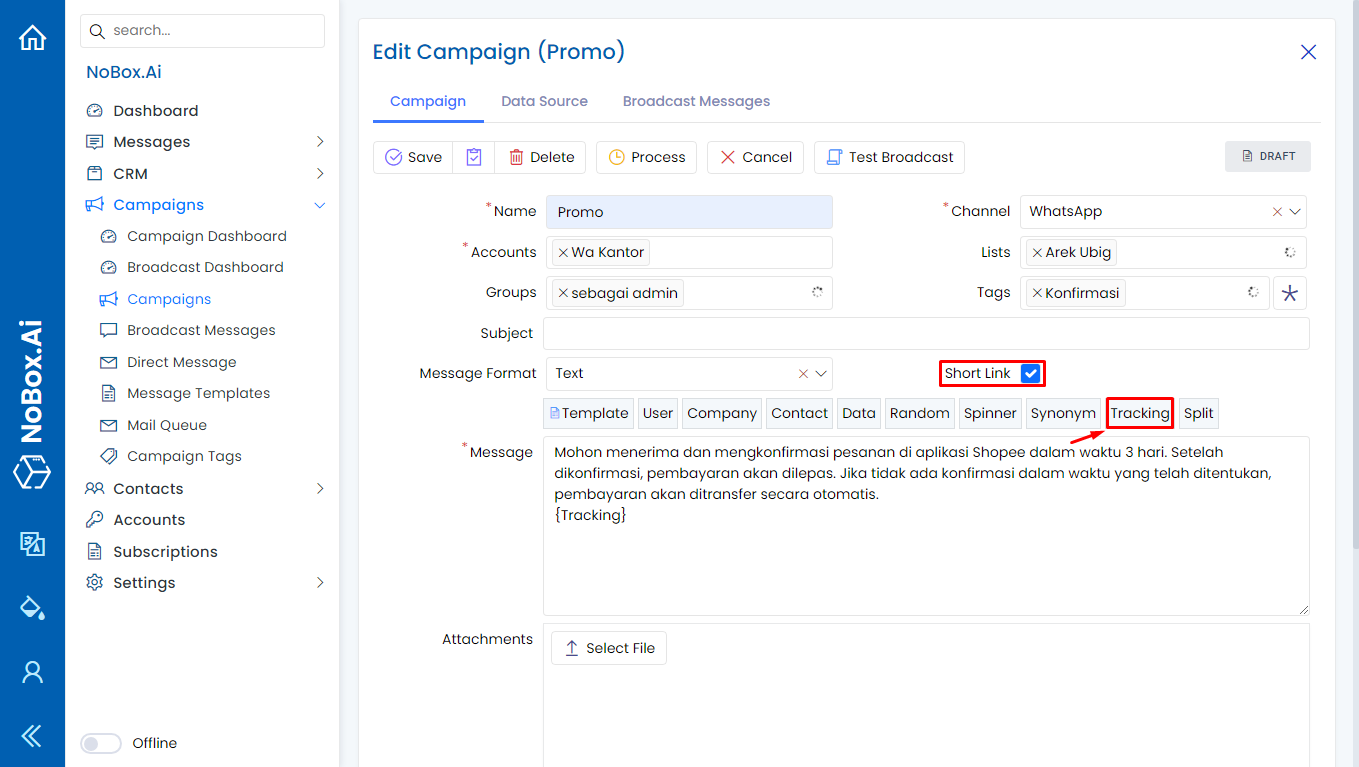
How to Use Short Links
Short links are used to replace long and complicated original links with more concise and easily shareable links.
How to use a short link as follows:
- Enable short links
- Ensure that the Bitly integration is added under the [Integration] tab in the [Business Profile] menu.
- Fill in the message with tracking data
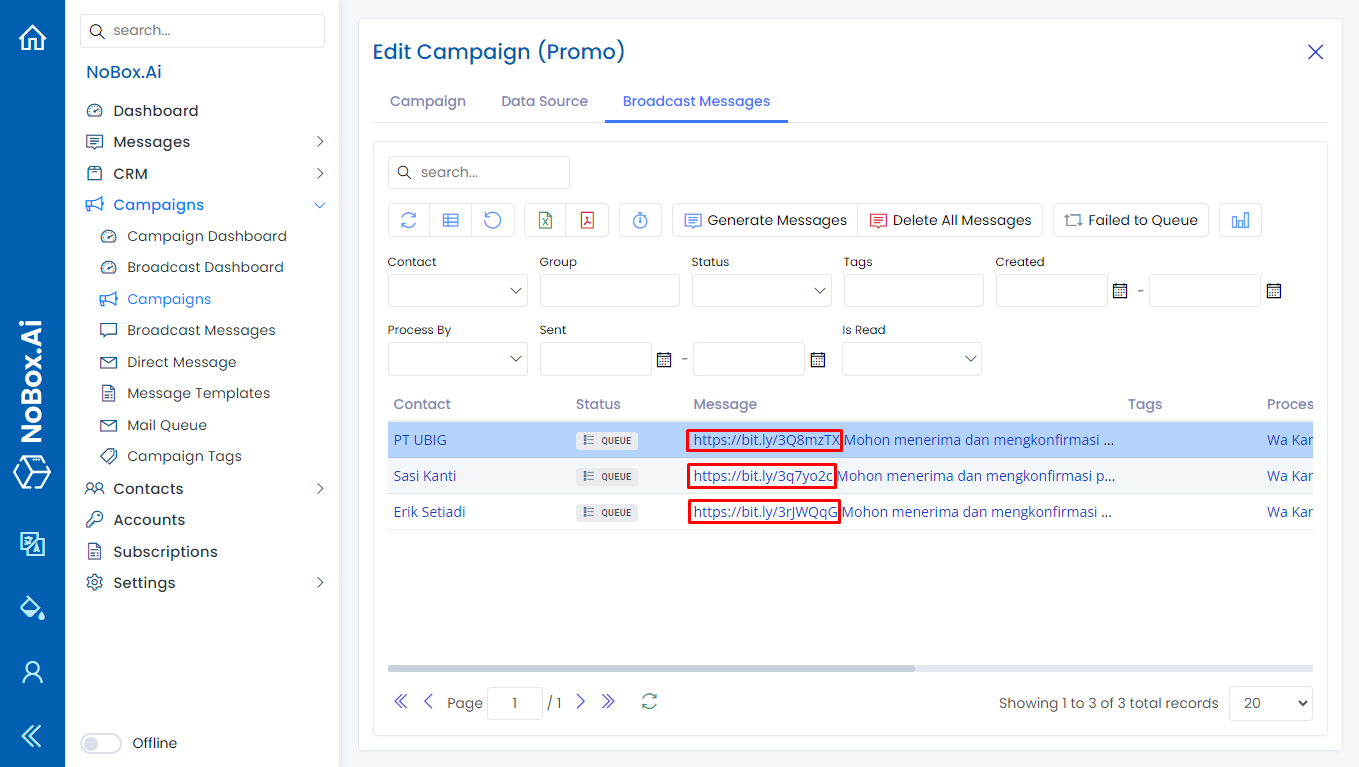
4. If everything is complete and accurate, proceed with [generate message], and the result will display as follows.
How to Use Data Sources
Data sources are used to add information to contacts in the form of an Excel file. Here’s how to use the data source:
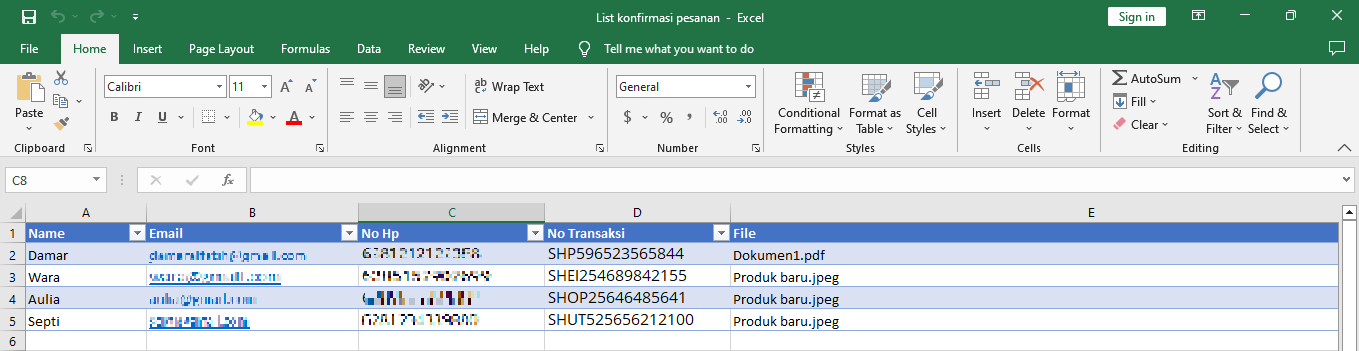
1. Upload file excel pada tab [Sumber Data] pastikan pada file excel tersebut terdapat data kolom yang isinya sama dengan data external id link.
If the example uses a contact's external ID with a phone number, the Excel file will have a phone number column with data matching the contact's external ID as per the selected list.
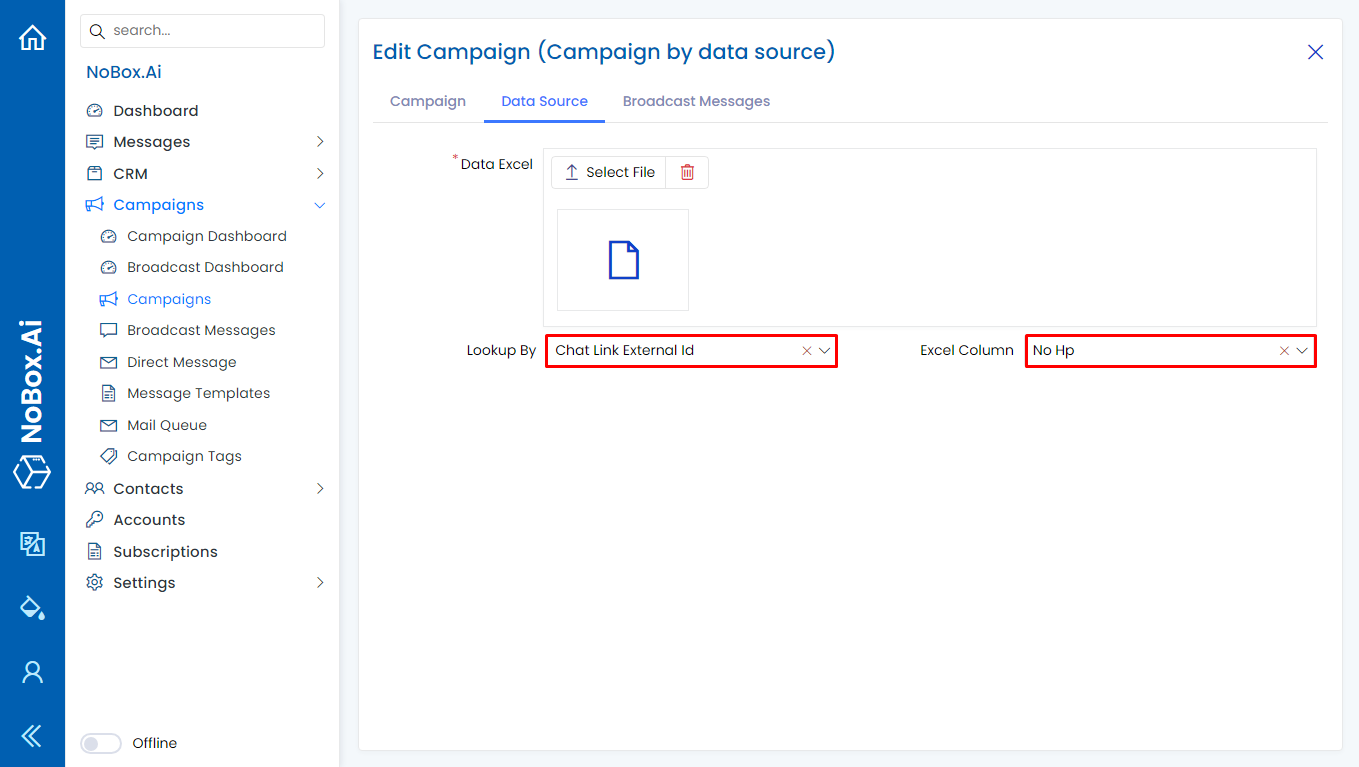
2. After uploading the file, select [Matched From] ➔ and choose [Excel Column] that corresponds to the Excel column matching the external ID data.
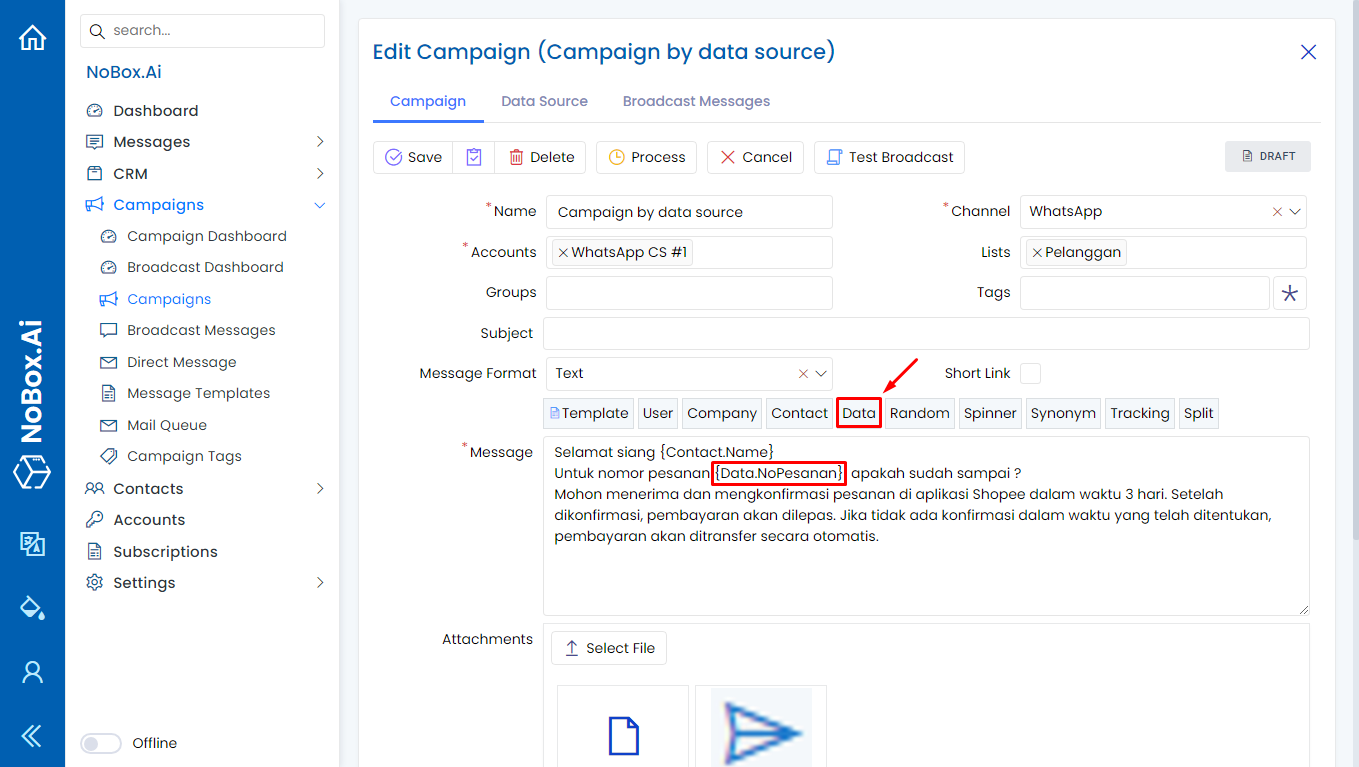
3. To send messages according to the Excel data, you can do it by clicking on [Data] in the message section and filling in the data with the name of the Excel column you want to display.
4. If everything is complete and correct, continue by clicking [Create Message], and the result will appear as follows.
How to Use Attachment Sending Based on Data Source
Send Attachments Based on Data Source
The feature to send attachments based on data source is used to send files according to the data in an Excel file. Follow these steps to use this feature:
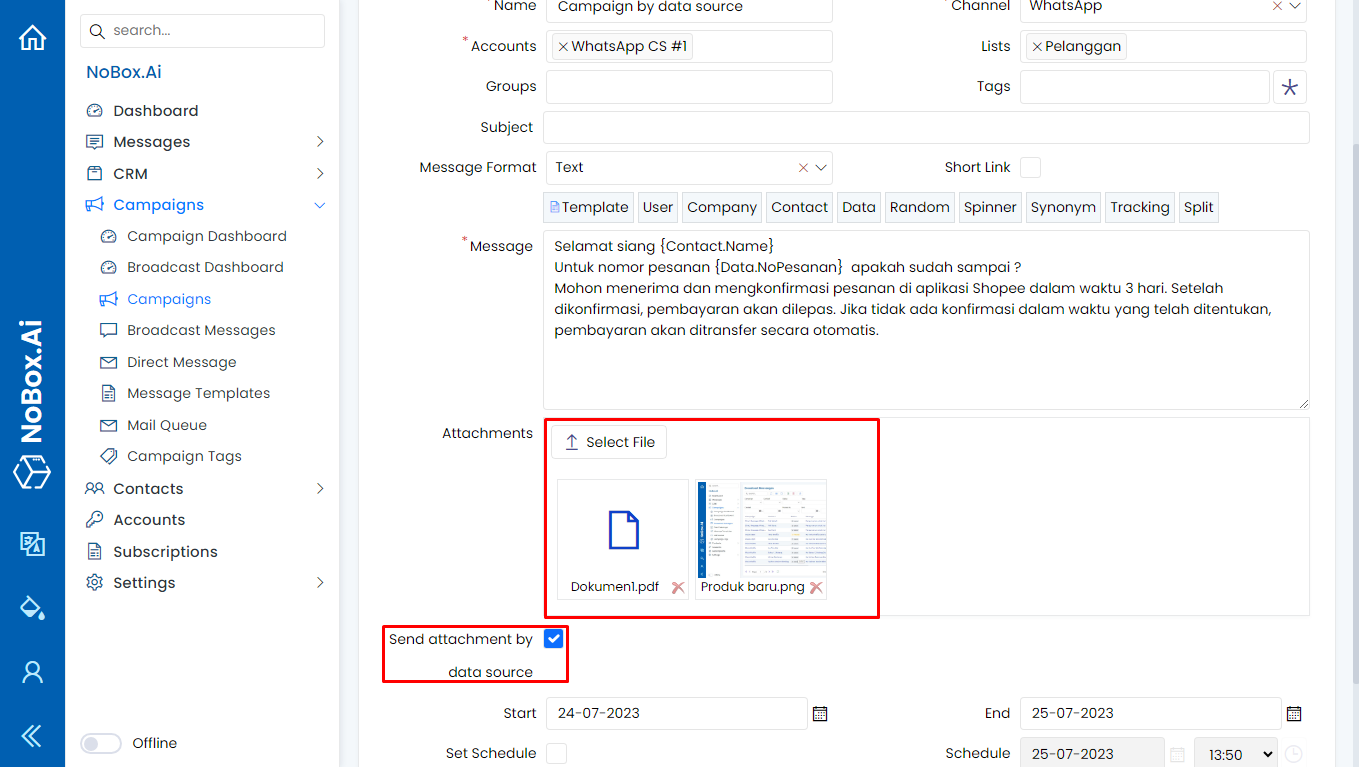
1. Upload the file to be sent in [Attachment].
2. Enable attachment sending based on data source.
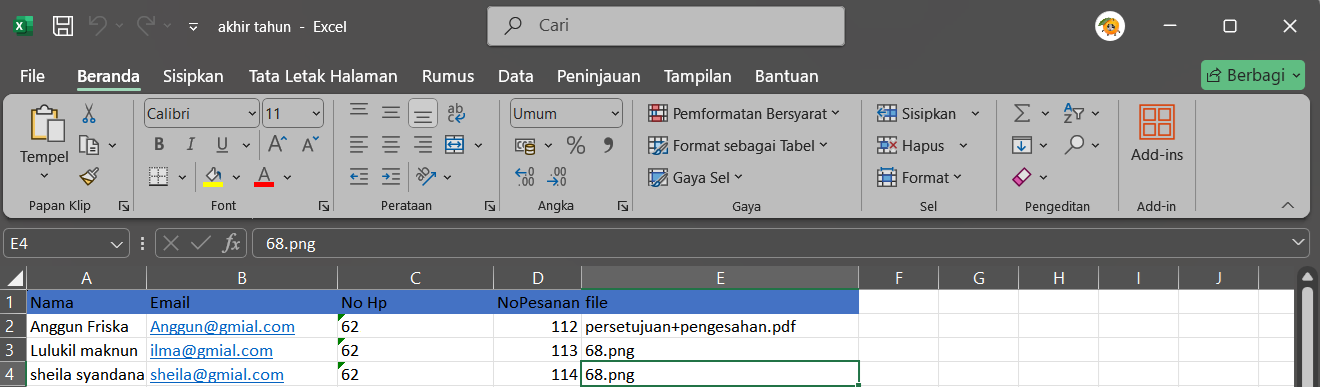
3. Upload the Excel file in the [Data Source] tab. Ensure the Excel file contains a column matching the external id link data.
4. Add a column in Excel named [File] and fill it with the file names you have added in [Attachment].
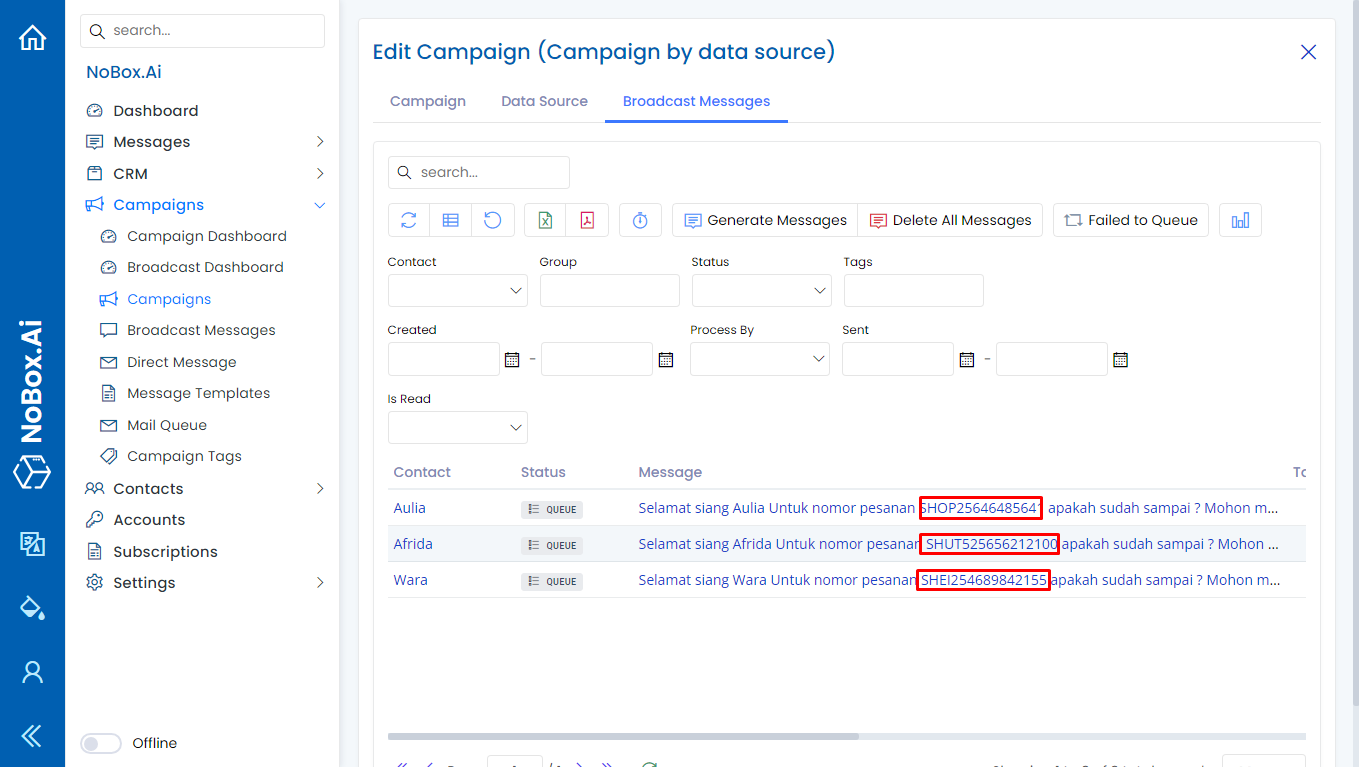
Once everything is complete and correct, proceed to [Generate Message], and the result will appear as follows. The file will be sent with the same name as the file in the data source.
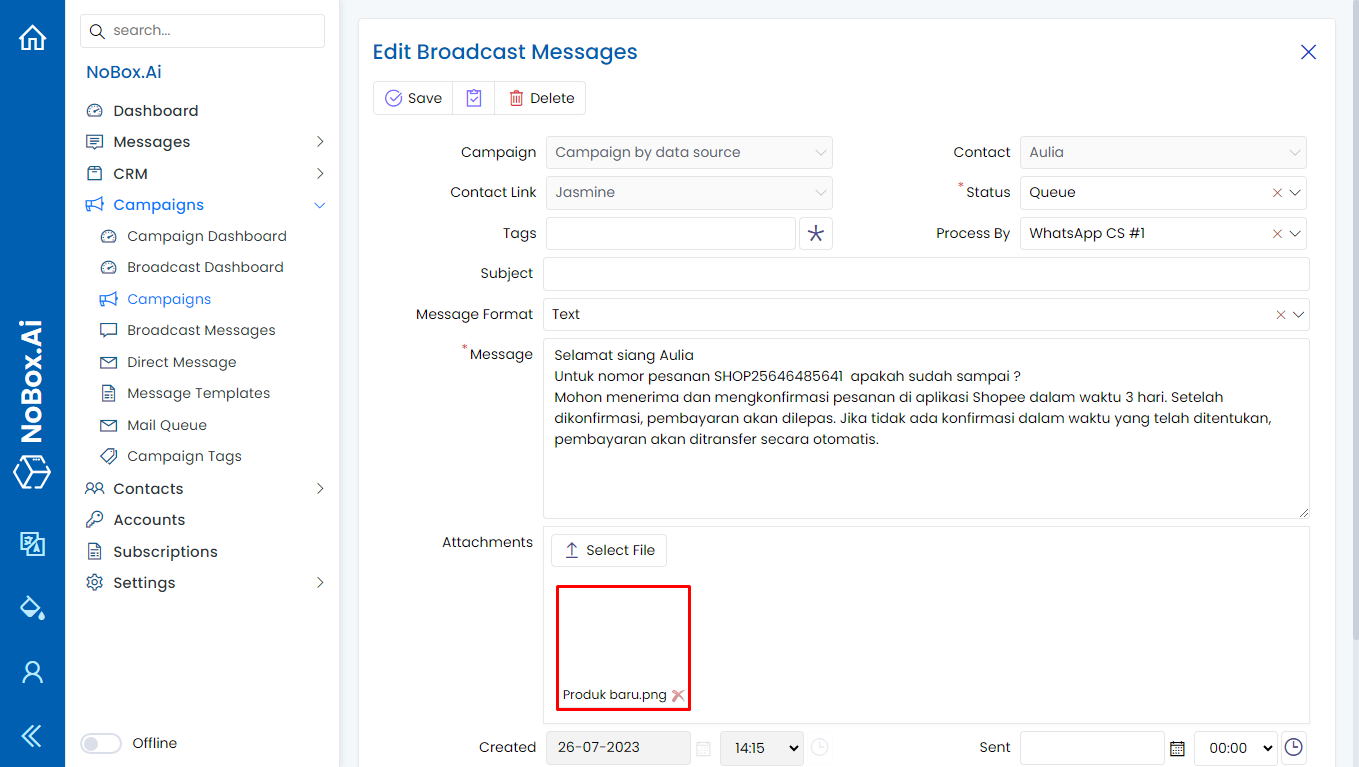
Edit and Delete Promotion Data
To edit a promotional data, please first select the data you wish to edit. Edit your data and click [Save] to save the changes.
To delete a promotional data, select the data you want to delete, then click [Delete]. A confirmation dialog will appear asking if you want to delete the data. If yes, click [Yes]; if not, click [No].
If you have any issues or difficulties related to Nobox.Ai, please contact us through Support Ticket